Saturday, August 28, 2010

Of Macaroni and Ramen

So...

My apologies for the hiatus in posting. We're still on the rationing train, so to speak, but just very busy now that things are getting to crunch time regarding the houses. We're aiming to have our house officially listed on the market by September 10th, which means the next dozen or so days will be filled with lots of painting, floor installation, yard work and such.

In the meantime, I thought you might be interested to know about convenience foods available during rationing since, with all this home repair chaos, convenience foods could be very handy.

Basically, there aren't very many.

There are no frozen pizzas or lasagnas or much frozen anything beyond juice, fruit and vegetables. In true spirit of the rationing program I haven't even been buying those "steam in the bag" vegetables when I do by frozen vegetables.

There are no boxed muffins, granola bars, cereal bars nor boxed meals kits.

What we do have is macaroni and cheese. Kraft's iconic blue box dinner was a new and popular dining option during WWII rationing. Two boxes of macaroni and cheese only cost one red point, which means it was (and is) a very popular vegetarian meal.
Otherwise, the only other convenience food available during rationing were boxed cereals and canned and dehydrated soups. I've written before about cereals here. Canned soups were rationed, but dehydrated soups were not. If you look to the right side of the handy dandy chart you can see an ad for Aunt Jemima's Rich Pea Soup - a dehydrated soup that is proud of it's just-add-water-and-heat approach.

Apparently, the range of options available in the dehydrated soup section of the grocery store was a bit more expansive in the 1940s than today. Grocery store ads reference dried vegetable soups, chicken soups and various types of pureed pea and/or beans soups. Today the dehydrated soup section is smaller than a bread box.

Unless you count Ramen noodles as an option.

Even though Ramen noodles weren't available in the U.S. until the early 1970s we've allowed them during rationing to bring our dehydrated soup availability up to the WWII rationing level.

Historically accurate? No. Filling the void of missing authentic supplies? Yes.

So during these next few weeks when the house is torn up and no one feels like cooking, we will be eating lots of cereal, sandwiches, macaroni and cheese and Ramen.

What are your favorite convenience foods?

--Rational Mama

Thursday, August 19, 2010

Screwed

Take a look at this excerpt from the April 18, 1943 edition of the Topeka Daily Capital:

(You can click on the chart to enlarge the image)

It's a handy dandy chart outlining exactly how much of each vegetable plant needs to be included in your Victory Garden and how many jars of produce should be preserved from the summer bounty to get a patriotic family through the next winter of rationing.

It makes me very unhappy.

The chart recommends 15 tomato plants per person, which would be 60 plants for a family our size, resulting in 120 quarts of preserves for future months. And beans? According to the chart we would need 300 feet of green beans to have enough to eat and preserve the suggested 108 quarts.

Ummm...yeah.

Even if the the summer hadn't pre-baked the tomatoes and eggplants on the vine there is no way we could even get close to these ideals. Despite having gardens in four different parts of town, we have no where near the room to accommodate this large of a plan. And I have to wonder if folks in the 1940s had similar restrictions. Is (and was) the numbers set forth in this chart a realistically obtainable goal?
Let's talk about space first. During WWII many vacant lots were turned into community gardens and businesses frequently allowed employees to garden on their grounds. We are not so lucky today. Here at Rational Living we managed to patchwork four different spaces together in our general area of town, but combined it is still no where near the space needed for 60 tomato plants, 300 feet of beans, 60 feet of lettuce/spinach, 48 feet of carrots, 60 feet of onions, 3200 feet of potatoes, and so on. It's seems like even an acre of suitable land may not be enough to plant all the recommendations in the chart, even if one is being wise and rotating early/late crops in the same space. Was that kind of space really available in during WWII rationing?

And then there's time. Who the heck is keeping up with all this gardening? The weeding, hoeing, pruning, and harvesting can become overwhelming with a modest-sized garden. What about a larger garden? While somewhere around 3/5th of the population gardened during the War, I seriously doubt that a significant portion of those Victory Gardens matched the ideals set forth in the chart above, just based on time considerations alone. And even though it makes sense to think of all those housewives spending their days out in the Victory Gardens before making a delicious SPAM loaf for their loving family's dinner, in reality a large proportion of Victory Gardeners were men. In fact, most of the propaganda surrounding Victory Gardens focuses on men as the growers, with women reduced to the role of harvesters or processors (this is deftly pointed out in Amy Bentley's Eating for Victory: Food Rationing and the Politics of Domesticity).
By the way, the Rational Living experiment mirrors this quite nicely, with TMOTH doing most of the weeding and such while I'm at work, since he is off four days a week. And then I do the canning and other processing on my days off, while he's at work. Sigh.

Anyway, what's my point in all this? My point is that it's really really easy to feel like a failure at Victory Gardening. And I imagine the same was true in the 1940s. With ridiculous charts like the one above it's easy to feel beaten even before you begin. And I'm sure there was always someone else's Victory Garden that was bigger and better than yours.

So yeah, I'm disappointed that our gardens don't match the WWII ideal. And I'll miss having all those preserves to choose from during the winter months. But I won't miss storing all those jars, and I won't regret spending time at the girls' swim meets instead of weeding.

And I won't be defeated. I'm already planning next year's garden.


--Rational Mama


Wednesday, August 18, 2010

Roasted Garlic

One of my favorite ways to use our homegrown garlic (besides adding it to pesto) is to roast it. But rather than roasting whole heads of garlic, I roast garlic cloves in oil. By roasting them in olive oil you end up with not only roasted garlic, but a good supply of roasted garlic oil, too!

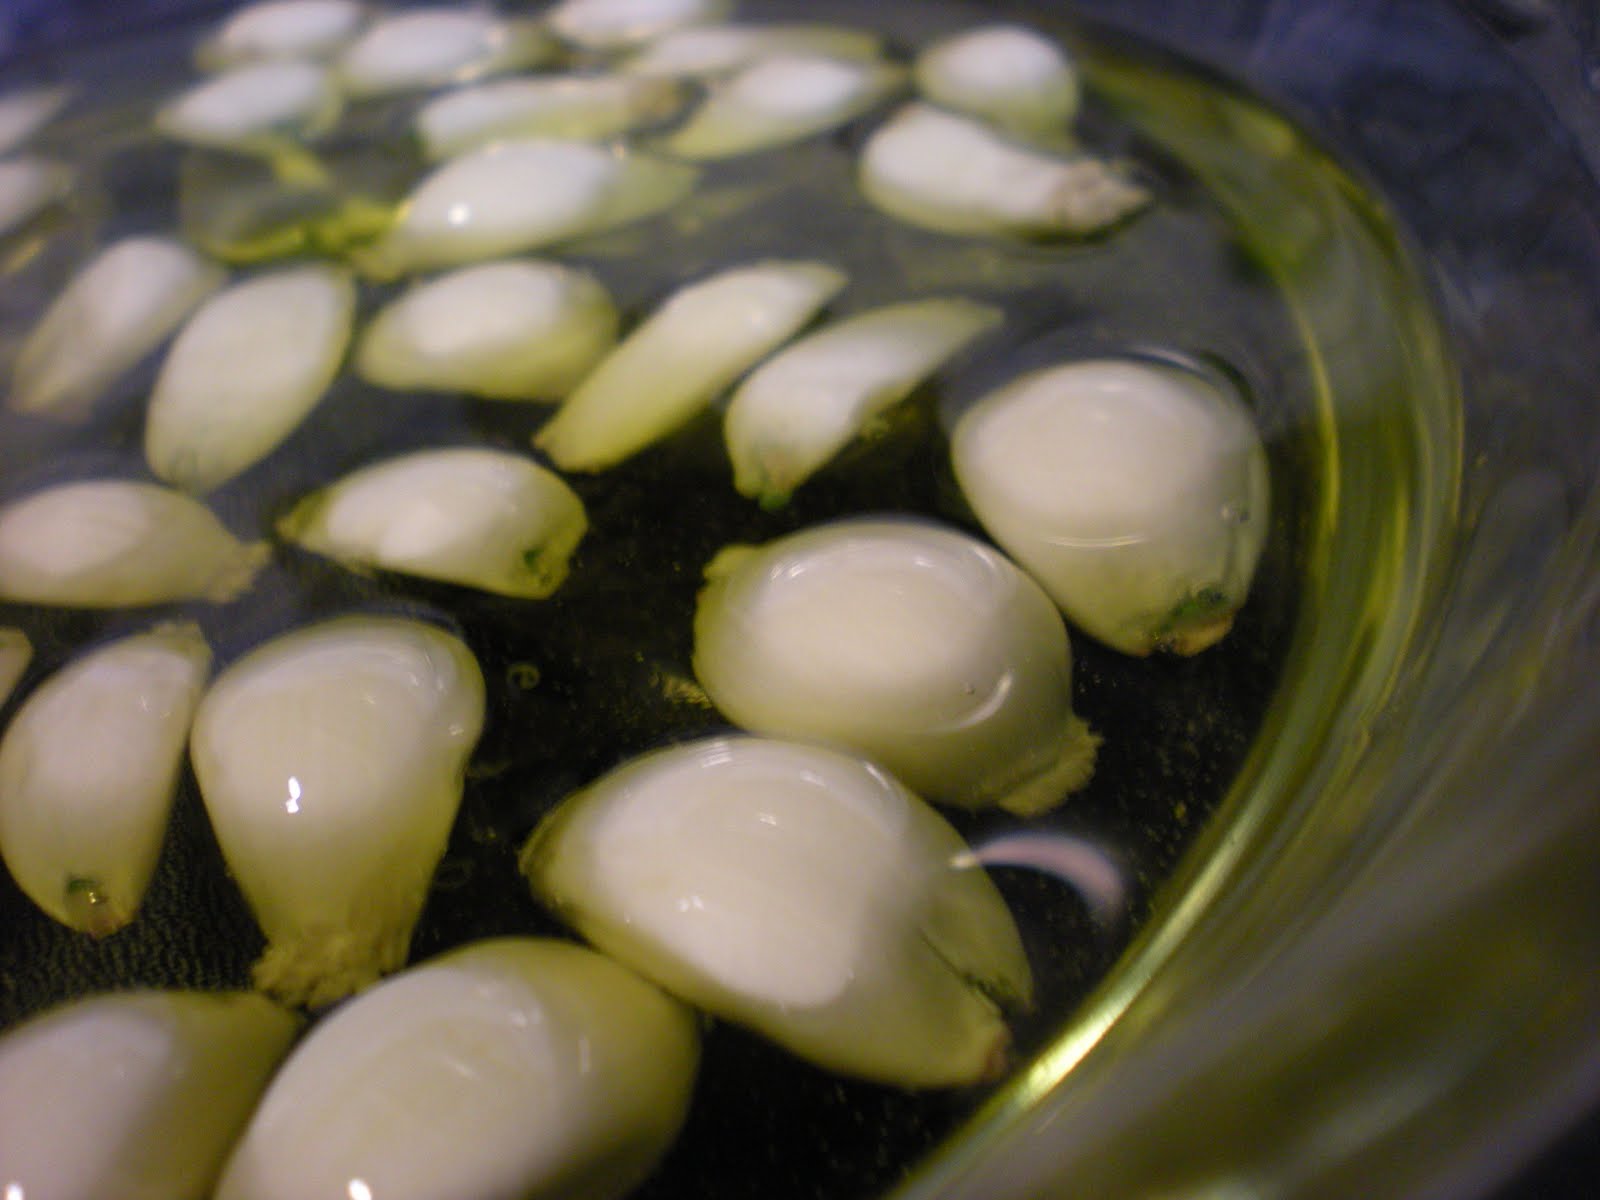
To accomplish this, peel a dozen or more garlic cloves and place them in a shallow, oven-proof dish (I usually use the glass pie plate for this). I then pour enough olive oil in the dish to cover the garlic cloves.Place the dish into a 370 degree oven for 25-30 minutes and you'll end up with a wonderful aroma in your house and this:

Slightly browned and roasted garlic cloves in bubbling oil. Yum!

Place the garlic cloves in a blender or food processor with a few tablespoons of their cooking oil and puree. This puree will keep in the refrigerator for a few weeks, as will the garlic oil.

The roasted garlic puree and roasted garlic oil can be used in recipes requiring either fresh garlic or regular olive oil.

One of my most favorite things to make with roasted garlic and roasted garlic oil is to use them in a feta cheese spread.

Ingredients
6 oz feta cheese (preferably NOT the low-fat variety)
2 TB roasted garlic oil
2 TB roasted garlic puree
2 TB lemon juice
1 TB minced fresh mint leaves (or 1 tsp dried mint leaves)

Puree all items in food processor or blender. A bit more oil can be added if the texture isn't quite creamy enough.
This spread is amazing on bread (regular or toasted), as a pasta topper or as a sandwich spread.

But I never make too many plans for one batch, because it never seems to last long in our house!

--Rational Mama

Monday, August 16, 2010

It Was So Hot...How Hot Was It?

It was so hot...people ran out of superlatives.

So, we caved and turned on the house air-conditioner in the wee morning hours of June 23rd. For the next few weeks it ran sporadically until July 13th.

The air-conditioner switch stayed in the "on" position from July 13th until this morning.

Why? Because a massive heat wave started on July 14th and this has been the hottest summer here in at least the past decade. Ugh.

Since July 13th we've had 25 days with the heat index at or above 100 degrees.

Seven of the last 14 days have had temperatures at 103 degrees or higher. That's just the temperature - not the heat index.

This year July had 17 days with highs above the average.

So far in August all but one day has had above average highs.

But how does the summer rank historically?

According to NOAA, 1943 (our template year for rationing) is ranked as the 15th hottest summer on record in these parts. In comparison, 2006 (which had been the hottest year in the past decade or so) is ranked as the 21st hottest year on record.

Considering we're blowing the 2006 figures out of the water, I'd say we've ended up with a fairly historically accurate summer.

So we've been running the air-conditioner in the house (set between 78 and 80 degrees), instead of taking in the daily showings at the local "air-chilled" theater, instead of spending copious amounts of time at the public swimming pools or bathing in ice water (all 1940s examples). But in the 1940s life would sort of stop during this kind of summer heat. We didn't have that luxury.

Don't loose complete faith in us - we've only run the air-conditioning in the vehicles on a few long road trips where having the windows down would actually decrease energy efficiency. Otherwise, I know of one time that TMOTH used the air-conditioning in the car and I used it once last week when it is was so hot I was actually having trouble concentrating on the road (the van thermostat registered an outside temperature of 112 degrees - I felt justified).

And my job is only semi-air-conditioned, a little of both worlds just to keep my body confused. Poor TMOTH suffers three times a week when he goes to work in an un-air-conditioned warehouse.

Yards and gardens around town are crispy and dry, due to a combination of ridiculously high temperatures and very little rain. But they're not a total loss - we're still bringing in enough tomatoes to warrant canning before they rot.

But a cold front moved in yesterday and the air is absolutely delicious. We'll use these next few weeks to repair any damage to lawns, gardens and psyches that occurred over the last month.

That is, if any of us can stop smiling at the change in weather.

--Rational Mama

Saturday, August 14, 2010

Historic Recipe: Jellied Ham Loaf

This is yet another recipe from Betty Crocker's rationing recipe booklet. Now, there's been more than one recent work of web-based journalism covering some of the horrific concoctions we Americans have managed to create with humble Jell-O. Since most of these stories end with me throwing up in my mouth a little, I was a dubious about trying a meated gelatin recipe. I don't even like most of the fruit-based Jell-O recipes. But, in fairness to the rationing year and to those generations who grew up during WWII (and its shadow) I decided, despite my misgivings, that it was a must.

After all, serving a Jell-o dish during the summer was a sign of wealth in the late 1930's/early 1940's. Since Jell-O (and any gelatin, for that matter) requires a cool environment to set, serving a Jell-O-based dish in the summer heat was a subtle yet unmistakable way of saying,"Take, that, hussy - my man can afford to buy me a refrigerator," at the neighborhood picnics.

Despite this status I did have one very strong warning from friend/colleague Ms. Grasslands when she heard the next historic recipe was to be a jellied ham loaf. "Jellied ham loaf," Ms. Grasslands wrote, "Was literally the only dish I could not eat as a child. It made me choke. I could eat everything else you've blogged about, including liver and onions, heart, tongue, but not ham loaf. I'm retching even as I type." Egads. This definitely made me second guess my choice, especially considering how our last historic loaf recipe turned out. But, I made a firm decision to be optimistic. After all, this was a rationing recipe that did not require a white sauce (gasp!) and, as TMOTH pointed out, we'd basically just be making our own SPAM. Right?

Before we get too far into the details of the recipe, I want to point out that the first ingredient listed is ham shanks. This is one of those mythical meats that I've heard of but never purchased and really have no idea as to it's original placement on the pig. The first result from my Google search entitled, "What is a ham shank?" informed me that it is, apparently, a pithy name for an act of masturbation. Umm...luckily the second result informed me that a ham shank is from the lower portion of the pig's leg. According to this source, ham shanks have less fat and are not as meaty as the traditional butt end ham.


Rationing-wise they're also considerably cheaper on the point scale than traditional ham. On our handy-dandy chart ham shanks are five points a pound, whereas traditional ham is a whopping 12 points per pound. I'm sure this fact alone made creative ham shank recipes popular during WWII rationing.

Here's a quick run-down of the recipe:

1. Simmer 2 1/2 pounds ham shanks in a pot of water for two hours.
2. Pull ham meat from the bone and grind enough meat to make 2 cups.
3. Soften 1 TB gelatin in 1/4 cup cold water.
4. Dissolve 2 beef bouillon cubes in 2 cups hot ham stock.
5. Combine gelatin mixture, bouillon mixture and ham together with 2 tsp horseradish, 2 tsp prepared mustard and 1 1/2 cups corn or bran flakes.
6. Chill until firm in oiled bread loaf pan.
7. Unmold and slice.

Let me tell you that there is nothing pretty about this recipe. Ground ham shank looks like reject dog food and once you combine it with the bran flakes and warmed broth/gelatin mixture it looks more like a science experiment gone horribly wrong rather than something edible (at least, something edible to an organism that lives outside of a petri dish). Rather than pat it into a loaf pan I used a roundish bowl instead. I felt like the cubic confines of the loaf pan could not contain the organic awesomeness of the ham loaf. That, and I thought it would look prettier on a plate if it was round.

Oh, and I was very much thankful that the girls were not in the kitchen while I made this up in the morning. I knew that if they saw the taupe, viscous mixture in its un-gelled state then it would be over before it all began.

After a very hot day (automobile thermostat declared the outside temperature at 112 degrees at one point) which included swimming, piano practice, laundry and such dinner was a snap since all I had to do was cook the fresh corn on the cob and decoratively arrange the jellied ham loaf on plate. Of course, I still had to get the loaf out of the mold.

Now, when the directions said to place the concoction in a oiled pan, I took the "oiled" part seriously, slathering what seems like way too much canola oil along the inside of a metal mixing bowl. I assumed that this ensured a nice, quick slip of the molded meat onto the plate come dinner time.

I was wrong.

My first attempt at flipping the loaf bowl contents onto a plate resulted in...nothing. So I kept the bowl turned over on the plate and hammered the outside of the bowl with the blunt end of a wooden spoon. Still, no slippage.

I took a butter knife and ran it around the outside edges of the loaf, sure that it would release the mold just as the same technique releases a cake from its pan. No go. Not even when I banged it some more with the wooden spoon.

Did Newton every write a law about the physical inertness of jellied meats?

Confounded, my next act was to use said butter knife to slide around the side of the loaf again and pry the bottom off of the bowl's surface. A quick flip over onto a plate and...nothing. A few more thumps of the wooden spoon and soon I heard the satisfying slurping noise of the loaf disengaging from the bowl and landing firmly on the plate.

Thank goodness I didn't use a real fancy mold or else I would never have been able to get the loaf out in one piece.


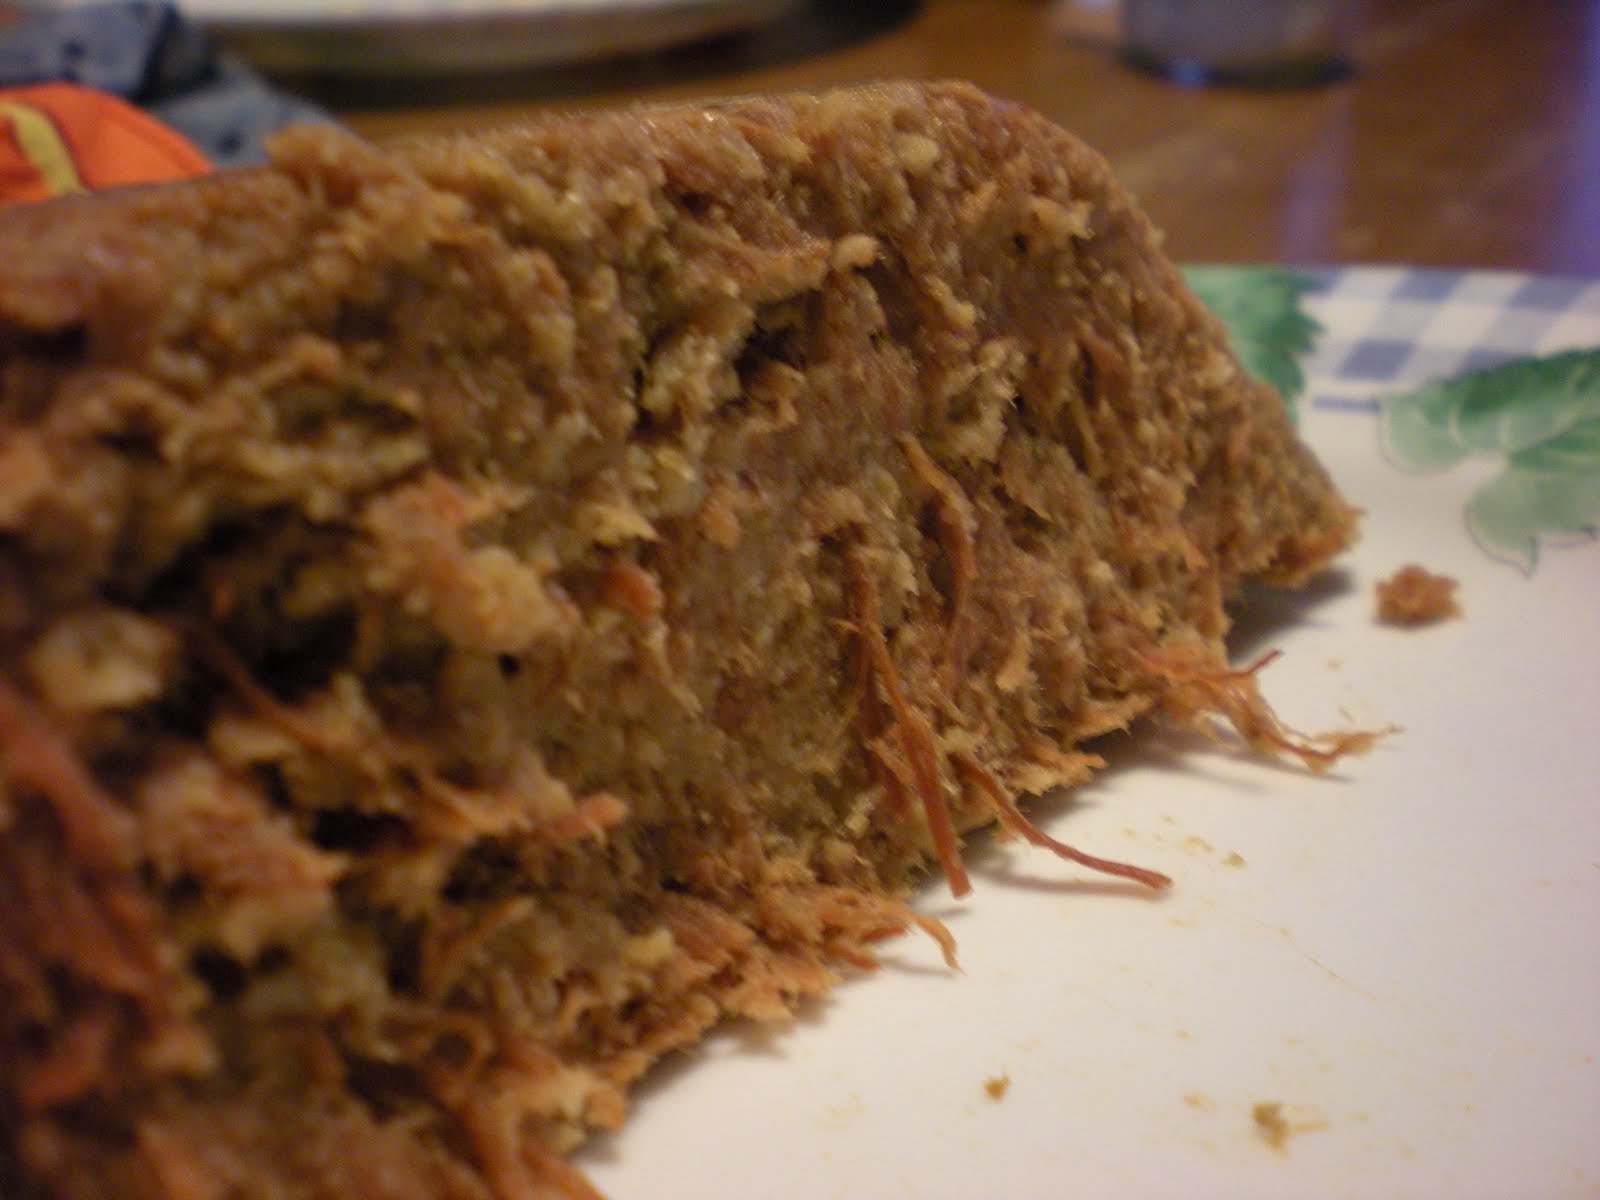
And yes, friends, it was very reminiscent of the sound molded moist cat food makes as it slurps out of its tin can and into kitty's dish. And you know what, it looked a lot like it, too.

When I sat the jellied ham loaf on the table for dinner the girls gave it a quizzical look and proceeded to poke it, as they had previously done with the SPAM. After asking them to stop poking the meat I used a knife to carve slices off the loaf. "Carving" might be a a generous term to describe the sectioning of the loaf, since it didn't slice very cleanly. I placed portions on each of the girls plates (along with a squirt of the obligatory ketchup) and waited for them to take a taste.

Since it was not a bean or vegetable-based dish Sissy was the first to dive in. "It tastes a lot like SPAM," she replied, and soon Eowyn was taking a bite of her slice. Eowyn agreed with the SPAM comparison. And then they kept on eating.

TMOTH and I both though the loaf was palatable, but suspected it would be better pan-fried (if the gelatin would hold up to the heat).

At one point one of the girls said, "It would be better in a sandwich, with ketchup and mayonnaise." Actually, that must have been Sissy because she thinks anything can be made better with mayonnaise. We all agreed with her statement so off she went to get bread from the kitchen. And she then proceeded to eat another slice of the jellied ham loaf while Eowyn finished all of her original slice and had a few bites of another.

So, I guess this was, surprisingly, a success. Go figure.

As for leftovers - oh, there are leftovers! The recipe says it will feed 8 to 10 people and I wish I would have read that before I made the recipe. I took a few slices in my lunch the next day and under the fluorescent glow of the break room the loaf definitely look less edible - mottled grays and pinks with an occasional ham string hanging out. I quickly ate my slices before anyone else came in to the room so that I didn't have to explain why I was eating cat food.

The next day I asked the girls what they have for lunch (they were home with TMOTH), and they said they had ham loaf sandwiches. "Were they good?" I asked. "Yes." was the unanimous reply.

Will we make jellied meat loaf again? Well, I don't plan to - at least, not immediately. I'm happy enough to say we made it and ate. Of course, we never know what the Randomizer will throw at us...there may be some week where all the red points we can afford for meat will make ham shanks (the meat, not the act) look like a good deal. In that case, jellied ham loaf it is.

At least it's not jellied pigs feet.
--Rational Mama

P.S. This seems to be the Rational Living post with the most potential for sexual euphemisms, considering the mentions of ham shanks, butt ends, meat grinding, and meat poking. Don't worry, we won't have our heads in the gutter for too long.

Friday, August 13, 2010

Take That, Rationing!

I just did a kung-fu roundhouse kick to the rationing chart. KA-POW!

Okay, maybe that's more figurative than literal...

But, I MADE KETCHUP (or, actually, catsup since that's how the recipe was labeled).

Ketchup is ridanculously expensive as far as ration points go (so expensive I had to use an imaginary word). One 14 oz bottle of ketchup will set you back more than one person's weekly allowance of blue/green points.

But having kids in the house means ketchup is a required condiment. They tell me, after all, that one can't possible eat hot dogs, hamburgers, french fries, onion rings, chicken strips and such without ketchup - to do otherwise would being considered abusive.

So ketchup we must have.

Using peeled, cored and pureed Roma tomatoes grown in our Victory Gardens (little hands are great peelers), I followed this recipe (adapted from the canonical Ball Blue Book Guide to Preserving).

1. Combine 2 quarts pureed tomatoes, 1/2 cup sugar and 1 1/3 cups vinegar in a large sauce pot.
2. Add a spice bag containing 2 TB whole allspice, 2 sticks of cinnamon and 1 tsp whole cloves.
3. Add 1 1/2 tsp paprika (I used Hungarian), 1 tsp dry mustard, 1 tsp salt and a pinch of cayenne pepper.
4. Cook slowly until thick, stirring frequently.
5. When desired thickness is reached (took about an hour for me), ladle hot ketchup into hot, sterilized jars, leaving 1/4 inch head space.
6. Add caps and rings and process in water bath for 15 minutes.

The recipe said it would make 2 pints and that held true, although I used some half-pints for shelf-life considerations once individual jars have been opened. In all, I think this adds up to about 35 or 40 points worth of ketchup. Not too shabby.

The final product is nice and thick, although a bit sweeter than I expected - I think I'll reduce the amount of sugar in any future batches. The girls both like it, although Sissy remarked that it was more of a hot dog ketchup rather than a dipping ketchup. Whatever that means. TMOTH said it was a very tomato-y ketchup, which I believe was a compliment.

I think I'll try to make at least one more batch before the end of summer. Combined with what we already have in the fridge that should give us more than enough to make it through the winter.

--Rational Mama

Wednesday, August 11, 2010

Mommy Pickles

Pickles weren't rationed during WWII, so why-oh-why do I find myself canning homemade bread and butter pickles?

Same reasons every year:

I like the aesthetics...


I like the control over ingredients...


And I like that the girls say "mommy pickles" are their favorite pickles.


Do you have a favorite pickle?

--Rational Mama